Christmas Tree Brownies
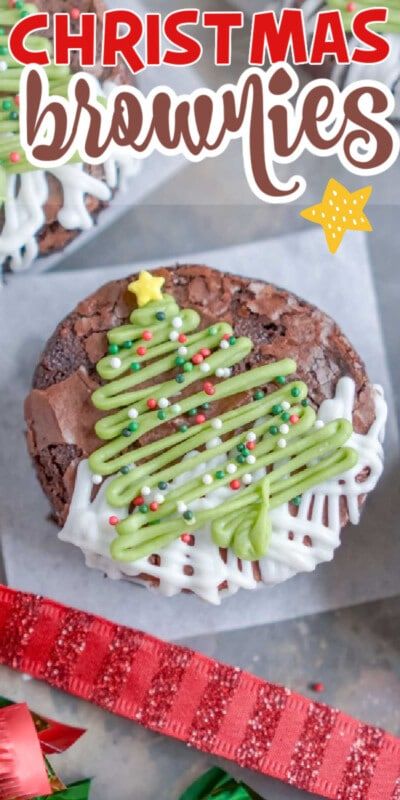
These Christmas tree brownies are adorable and delicious! They’re like little yummy snow globes with chocolate Christmas trees and snow!

Christmas just seems to be the time for cute treats and really just any treats at all. From the best chewy molasses cookies to cranberry orange bread that makes great gifts, Christmas is a time for baking!
These Christmas tree brownies are maybe the cutest treats I’ve ever seen. And they’re so easy to make!
Plus, they’re fun to decorate so great to make with the kids who like to decorate their own Christmas trees.
Add a bunch of these to a plate with one of these cute you’ve been treated holiday gift tags for the sweetest holiday gift for your neighbors or friends!
Or enjoy a round with your family after some of these fun Christmas games!
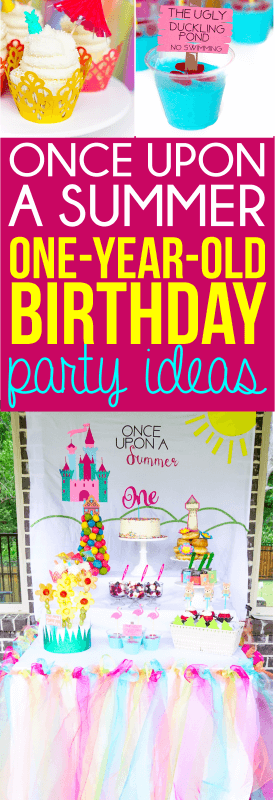
30th birthday gift ideas for husband
Ingredients

Ingredient Notes
- Brownie mix – I always use a store-bought brownie mix for brownies because they have brownies perfected. My favorite is the Ghiradelli brownie mix !
- Eggs, water, and oil – I’ve included these in the ingredients list because most brownie mixes uses these to make the brownies. If your brownie mix doesn’t, use whatever yours calls for. You just need to make the brownies like normal.
- White bark – you can either use white almond bark or white chocolate, you just need something white that melts (and solidifies again) well.
- Christmas sprinkles – the little tiny ball sprinkles (nonpareils ) best on these rather than the jimmies (longer rectangle sprinkles) since the trees are so small. Plus, they look more like ornaments.
- Star sprinkles – I used these Wilton stars but I’ve seen them in quite a few different Christmas sprinkle packages in stores as well.
You’ll also need a circle cookie cutter, or you can use the top of a glass, but I prefer the cookie cutter for a perfect circle cut out. I have this nested set of circle cookie cutters that I use all the time!
Instructions
Okay so this really is a simple recipe but there are a few tips you need to be aware of while you’re cooking to get the best results possible!
Also, I’ve included tips for making the snow, trees, and decorations BUT you can get creative here if you want to decorate in some other way. And I mentioned it already, but this is a really fun activity to do with the kids if you want to let them decorate too!
Start by lining a 9″X13″ pan with parchment paper and spraying lightly with cooking oil.
Make your brownie batter according to the package directions. Mine used eggs, oil, and water to combine with the brownie mix. Just do whatever the box says for this one.

Pour the batter on top of the parchment paper in the baking sheet. You’ll see in a bit why you want to use the parchment paper instead of just putting the batter directly into the pan.
Bake the brownies according to the package directions. When done baking and let the brownies cool completely.

After the brownies are completely cooled, place them in the freezer for 30 minutes and make sure they get hard. Don’t worry, they won’t stay this way – this just makes it so that you can use a cookie cutter to cut out the circles.
Once they are hard, remove from freezer and then lift the parchment paper with the brownies out of the pan and place on a hard surface.

Using a circle cookie cutter, cut brownies out and place on a baking sheet that has been lined with parchment paper.

Now divide the white almond bark or white chocolate into two bowls with 6 ounces in each bowl. You need two bowls so you can have one (for snow) and one that will be green for the trees.
Heat one bowl of the bark or white chocolate in the microwave in 30 second increments until melted. Or if you’d prefer to not use the microwave, you can double boil the white chocolate on the stove. I always prefer double boiling, but it does take a few more minutes than the microwave.
Tip!
To double boil the chocolate – fill a pot about 1/2 way full with water. Put a glass bowl on top of it. Turn the heat on to high and place your chocolate in the glass bowl. When the water in the pot boils, it will melt your chocolate.

Put the melted bark or white chocolate into a zipper plastic bag and cut a tiny tip of the corner off the bag.
Drizzle the white melted bark or white chocolate on the lower half of the brownie to create snow.

Next melt the other bowl of bark or white chocolate the same way you did the first one but add 6 drops of green food dye after it’s melted and mix until you have a consistent color.
Put in a zipper plastic bag and snip a little piece of the corner off to make a tip.
30th birthday party ideas for boyfriend

With the green chocolate, create a tree on the brownie. This works best if you pipe the tree all in one motion (meaning piping it all at once rather than starting, stopping, and starting again).
But if you mess up, just add some more green chocolate swirls and I promise it’ll still taste good!

Now comes the fun part and the best part to do with the kids!
Add holiday sprinkles to look like little ball ornaments. Make sure to do this kind of quickly after you add the trees so the chocolate is hardened yet.

Then finally finish off the brownies with a star sprinkle. If you need to add a bit more chocolate to the top of the tree for the star to stick, go for it!

Let the chocolate harden and the brownies come to room temperature (since they were in the freezer!) before enjoying!

Expert Tips
Double the brownies but not the bark to double the recipe. There’s enough bark to make up to 20 brownies.
Double boil all the chocolate at once instead of splitting it in two batches to save time. Remove half when it’s melted to make the snow and leave the other half in the bowl (turn off the heat, it’ll stay melted). Remove the other half from the bowl when you’re ready to make the trees.
Mix the green food coloring into the chocolate in a disposable bowl so that you can simply throw away when you’re done instead of dealing with the mess.
Drizzle the chocolate quickly and in one fluid motion as much as possible for the best looking snow and trees.
Store in an airtight container and enjoy within five days . Although they’re brownies so I’m guessing they won’t last that long! They don’t at my house at least!
Recipe FAQs
Do I have to freeze the Christmas tree brownies?Yes, you know how brownies tend to fall apart (making them so delicious…), they’re fall apart when you try to cut out the circles if they’re not hard.
How many brownies does this make?This should make 10 brownies if you’re using a standard 3 1/2 inch circle cookie cutter. It’ll make more if you go smaller and less if you go bigger.
What do I do with the extra brownie pieces?Eat them! Or add them to a milkshake for something resembling this chocolate cake shake with brownies instead!
99 angel number meaningCan I use my own brownie recipe?
Sure! Just make sure that after the brownies are done, you freeze them so they don’t crumble when you use the cookie cutter!

More Easy Cookies and Bars
- Sopapilla cheesecake bars
- Chocolate brownie cake
- Homemade moon pies
- Pecan pie bars
- S’mores bars
- Pumpkin cheesecake bars
Want more delicious recipes just like this one? Enter your first name and email address in the form below to join the Play Party Plan community! You’ll receive weekly recipes and party ideas directly to your inbox!
Christmas Tree Brownies
These Christmas tree brownies are adorable and delicious! They’re like little yummy snow globes with chocolate Christmas trees and snow! Prep: 10 minutes Cook: 40 minutes Total: 1 hour 20 minutes Serves10 brownies
 Ingredients
- ▢ 1 box brownie mix plus ingredients needed to make brownies
- ▢ 12 ounces white almond bark or white chocolate divided in half
- ▢ 6 drops green food coloring
- ▢ holiday sprinkles
- ▢ star sprinkles
Instructions
- Prepare and bake brownies according to package instructions.
- Let brownies cool completely.
- Once cool, place brownies in freezer for 30 minutes.
- Using a circle cutter, cut brownies and place on baking sheet lined with parchment paper.
- Divide bark into two bowls with 6 ounce in each bowl.
- Melt one bowl of bark in microwave at 30 second increments until melted.
- Put melted bark in zipper bag, cut one corner off.
- Drizzle white bark on lower half of brownie to create snow.
- Melt other bowl of bark in microwave at 30 second intervals, then add 6 drops of green food coloring. Mix well.
- Put green bark in zipper bag, cut one corner off.
- Create a tree with the green bark, add holiday sprinkles and star.
- Cool completely before serving.